
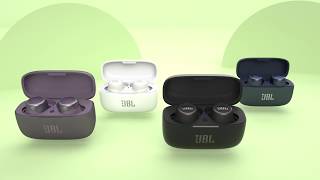
JBL Live 300TWS
Ekte trådløse øretelefoner med Smart Ambient
Sold from 2019 until now
Getting started with your JBL Live 300TWS
Quick Start Guide
Get up and running in no time with our easy-to-follow Quick Start Guide

Register your product
Do you own this product? Register it here! And claim your warranty or service easily
Register nowQuick Start Guide & Downloads
Product Specifications
- Driver size (mm)
- 5.6
- Driver sensitivity at 1kHz/1mW (dB)
- 95
- Dynamic frequency response range (Hz)
- 20 Hz – 20 kHz
- Impedance (ohms)
- 16
- Number of drivers per ear
- 1
- Lade-etuiets vekt (g)
- 53.7
- Charging Case Weight (oz)
- 1.9
- Øreproppens vekt (g)
- 13.6
- Earpiece Weight (oz)
- 0.5
- Bluetooth profiles
- A2DP 1.3, AVRCP 1.5, HFP 1.6
- Bluetooth frequency
- 2.402 GHz – 2.480 GHz
- Bluetooth transmitted modulation
- GFSK, π/4DQPSK, 8DPSK
- Bluetooth version
- 5.0
- Charging case battery life (max hours)
- 14
- Charging time (hours from empty)
- 2
- Maksimum spilletid (timer)
- 6
- Bluetooth
- Ja
- Charging cable
- Ja
- Touch-knapper
- Ja
- Voice Assistant integration
- Ja
- Ambient Aware
- Ja
- Built-in Microphone
- Ja
- Charging case
- Ja
- Hands Free Call
- Ja
- JBL Headphone App
- Ja
- JBL Signature Sound
- Ja
- Rechargable battery
- Ja
- Speed charge
- Ja
- Sweat Proof
- Ja
- TalkThru
- Ja
- True Wireless
- Ja
- Wireless
- Ja
- IP Code
- IPX5
Vær tilkoblet til musikken din, og din egen verden, til enhver tid.
Vær din egen herre. Med JBL LIVE 300TWS øretelefoner har du alltid tilgang til musikken du liker. Helt trådløst, uten kabler – den utrolige signaturlyden fra JBL gir deg friheten du trenger. Ton inn og ut med støydemping, vær på alerten med Ambient Aware eller bruk TalkThru til å chatte med venner – alt gjennom øretelefonene. Stemmeassistent, håndfrie anrop, lydstyrke- og støykontroll – alt er tilgjengelig gjennom berøringskontrollene. Hurtiglading gjør at du aldri trenger å gå uten musikk. Velg mellom en rekke farger for å finne det perfekte paret. Liten størrelse, heftig lyd. (*) Kun støttet på Android. (**) Android 6.0 eller nyere kreves for full tilgang til Alexa-funksjoner når du bruker denne enheten.
FAQs & How-Tos
-
This headphone does not support aptX, aptX HD, aptX Low Latency audio codecs.Was this helpful? Thank you for your feedback!
-
It is not uncommon to have charging problems with True Wireless headphones. You may encounter that charging stops, does not start at all or that one of the ear buds suddenly switches on and begins the pairing process. This is almost always caused by dirt on the metal charging contacts. These contacts are vulnerable because they can easily be contaminated by sweat, skin grease, or ear wax. They are usually gold plated, but gold plating does not prevent surface dirt.
If you have charging problems, the first step is to always clean all contact points, on each earbud and on the charging case.
You will need: cotton cloth or makeup swab, cotton swabs and rubbing alcohol. Also a pencil with eraser for further cleaning.
Use a cotton swab with some rubbing alcohol to clean the charging terminals of the headphones. Rotate the swab and scrub lightly on each contact surface, then use a cotton cloth to remove any dust and cotton residue left on the headphones. It is important to perform this process periodically to keep your headphones clean, thus avoiding affecting the charging speed/quality.
Wipe the contact pins in the charging case with a clean cotton swab. The swab can be slightly moistened with rubbing alcohol, but it is important that the interior is completely dry before closing the box. Use the cotton cloth and wait for it to dry.
Repeat until the contact points are visibly clean, and charging should work as designed.
Try cleaning the contacts with the tip of a pencil and the eraser at the end of the pencil, the graphite and rubber can help to re-establish charging also.
This procedure can be performed on all True Wireless Stereo earphones and cases.Was this helpful? Thank you for your feedback! -
If you are experiencing issues getting the app to communicate with your headphones, (assuming you have already paired the headphones with the device) go into the communication apps audio settings. You will likely find the resolution there. You may have to set your headphones as the ‘communication device’ within the app you are using.
Was this helpful? Thank you for your feedback! -
• Always have clear line of sight between your Bluetooth device (speaker, headphones etc.) and source device (Smartphone/tablet/PC etc). Be aware of obstacles in front of your devices.
• Try to shutdown other products that have Bluetooth, but are not being used. They are often the reason for interference even though they are not being used.
• Do not stand too close to your Wi-Fi router since a Wi-Fi signal is stronger and in many cases will "overlap" the connection.
• Be aware of walls around you. Concrete and brick walls will often interrupt the signal, as it cannot pass through such thick walls.
• Bluetooth signals cannot travel through water, which includes the human body. Make sure with wireless headphones to keep your source device and the receiver on the same side of your body.
• Open spaces such as parks can cause issues for your devices, as open air is "bad" for any Bluetooth signal if it cannot reflect from objects around you.Was this helpful? Thank you for your feedback! -
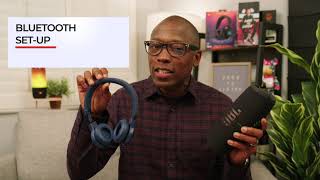
Visit the App Store and download the ‘Amazon Alexa’ App.

- Click the Plus(+) button on the top right of the screen.
- Then select ‘Add Device‘.
- Select headphones from the list and then choose your Headphones from the list of available devices.
- Follow the rest of the instructions in the Alexa App to complete the setup.
Was this helpful? Thank you for your feedback! -
If not pre-installed on your Android device, visit your App store to download the ‘Google Assistant’ App.
After you have paired your JBL headphones to your device via Bluetooth, you should receive a pop-up notification (pictured below). Please tap the notification on your device to start the Google Assistant setup. You will now be directed to the Google Assistant App.Step 1

Follow the steps to connect and pair “JBL XXXX-LE” (depends on your model) with your devices.
Once set up is complete, you will see the below screen:Step 2

PLEASE NOTE: In order to verbally interact with your Google Assistant via the headphone you must turn on the ‘Spoken Notifications’ in the Google Assistant App. This can be found under: Assistant Devices > Notifications. Alternatively, your JBL headphones can be added to the Google Assistant App manually by adding them as a Bluetooth device if this was not done when first paired. Google Assistant must be selected as your chosen voice assistant in the settings of the My JBL Headphones App also.
 Was this helpful? Thank you for your feedback!
 -
Visit your App store to download the ‘Google Assistant’ App.
After you have paired your JBL headphones to your device via Bluetooth, you should receive a pop-up notification (pictured below). Please tap the notification on your device to start the Google Assistant setup. You will now be directed to the Google Assistant App.Step 1

Follow the steps to connect and pair “JBL XXXX-LE” with the Google Assistant App, the name will depend on your model.
Once set up is complete, you will see the below screen:Step 2
PLEASE NOTE: To verbally interact with your Google Assistant via the headphone, you must turn on the ‘Spoken Notifications’ in the Google Assistant App. This can be found under Assistant Devices > Notifications. Alternatively, your JBL headphones can be added to the Google Assistant App manually by adding them as a Bluetooth device if this was not done when first paired. Google Assistant must be selected as your chosen voice assistant in the settings of the My JBL Headphones App also.
Was this helpful? Thank you for your feedback! -
Double-tap the button on the right earbud, then on the third tap - press and hold the button for more than 5 seconds (until the unit shuts off).
This restores the earbuds to the factory defaults.
TWS must be connected to perform the reset, so neither of the earbuds should be off or in the charging case.
It also may be necessary to remove or forget the earbuds from the list of paired Bluetooth devices in order to pair again.Was this helpful? Thank you for your feedback! -
To perform a hardware reset of your earbuds, press and hold the reset button on the charging case* for more than 5 seconds. This resets the earbuds without restoring the settings to the factory defaults.
* Location
Live 300TWS/Live Pro+ TWS: Inside the charging case between the earbuds.
Live Free NC+/Reflect Mini NC TWS/Reflect Aero: On the back of the charging case, next to the USB-C port.
Club Pro+ TWS: On the bottom of the charging case, next to the USB-C port.Was this helpful? Thank you for your feedback! -
To re-establish the functionality of the Advanced Swipe Controls (details in the image below), first update the My JBL Headphones app in the Google Play/App Store.
After the installation is completed, pair the earbuds to your phone/tablet through Bluetooth and open the app.
The earbuds will be detected and displayed in the app and you should see that a Firmware update is available.
Note: Advanced touch controls are deactivated by default, in the My JBL Headphones app go to Settings once your earbuds are displayed, then select Gestures and enable Advanced Swipe Controls. You can now select each function and assign it to a specific gesture.


 Was this helpful? Thank you for your feedback!
Images & Videos


Can’t find what you’re looking for?


Chat with us
Monday - Friday: 09.00-18.00
Saturday - Sunday: 10:00-16:00
