SoundBars
-
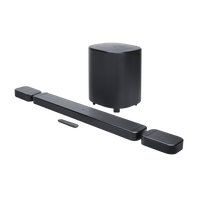
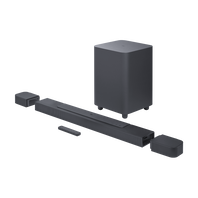
JBL Bar 1000MK2
7.1.4 channel soundbar system with detachable surround speakers, MultiBeam 3.0™, Dolby Atmos® and DTS:X®
Introduction Year: 2025View product -

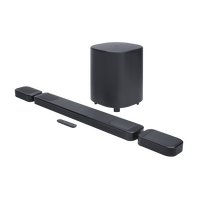
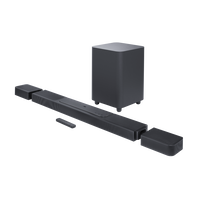
JBL Bar 1300MK2
11.1.4 channel soundbar system with detachable surround speakers, MultiBeam 3.0™, Dolby Atmos® and DTS:X®
Introduction Year: 2025View product -
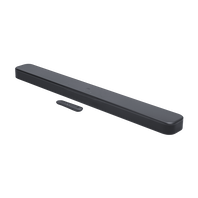
JBL Bar 300MK2
5.0 channel all-in-one compact soundbar with MultiBeam™ 3.0 and Dolby Atmos®
Introduction Year: 2025View product -
-
JBL Bar 300MK2
5.0 channel all-in-one compact soundbar with MultiBeam™ 3.0 and Dolby Atmos®
Introduction Year: 2025View product -
-

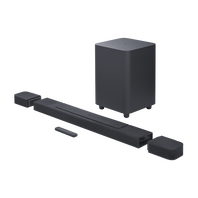
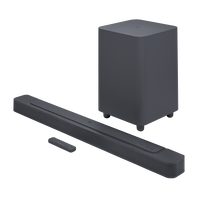
JBL Bar 500MK2
5.1 channel soundbar system with MultiBeam™ 3.0 and Dolby Atmos®
Introduction Year: 2025View product -
-
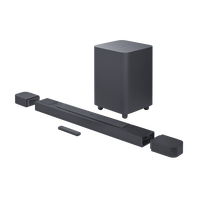
JBL Bar 800MK2
7.1 channel soundbar system with detachable surround speakers, MultiBeam 3.0™, and Dolby Atmos®
Introduction Year: 2025View product -

JBL Cinema SB180
The JBL Cinema SB180 soundbar offers 110W RMS of maximum power and ARC HDMI connection
Introduction Year: 2024View product -

JBL Cinema SB510
3.1 Channel Soundbar with a Built-in Subwoofer
Introduction Year: 2024View product -

-
-

JBL Cinema SB580
3.1 Channel Soundbar with Virtual Dolby Atmos® and Wireless Subwoofer
Introduction Year: 2024View product -
JBL Cinema SB590
3.1 Channel Soundbar with Virtual Dolby Atmos® and Wireless Subwoofer
Introduction Year: 2024View product -
JBL BAR 1000
7.1.4-channel soundbar with detachable surround speakers, MultiBeam™, Dolby Atmos®, and DTS:X®
Introduction Year: 2023View product -
JBL BAR 1300
11.1.4-channel soundbar with detachable surround speakers, MultiBeam™, Dolby Atmos® and DTS:X®
Introduction Year: 2023View product -

JBL BAR 1300X
11.1.4-channel soundbar with detachable surround speakers, MultiBeam™, Dolby Atmos® and DTS:X®
Introduction Year: 2023View product -

-

JBL Bar 2.1 Deep Bass (MK2)
2.1 channel soundbar with wireless subwoofer
Introduction Year: 2023View product -

JBL BAR 300
5.0-channel compact all-in-one soundbar with MultiBeam™ and Dolby Atmos®
Introduction Year: 2023View product -

JBL Bar 5.0 MultiBeam
5.0 channel soundbar with MultiBeam™ technology and Virtual Dolby Atmos®
Introduction Year: 2023View product -
JBL BAR 500
5.1-channel soundbar with MultiBeam™ and Dolby Atmos®
Introduction Year: 2023View product -
JBL BAR 700
5.1-channel soundbar with detachable surround speakers and Dolby Atmos®
Introduction Year: 2023View product -
JBL BAR 800
5.1.2-channel soundbar with detachable surround speakers and Dolby Atmos®
Introduction Year: 2023View product -

-

-
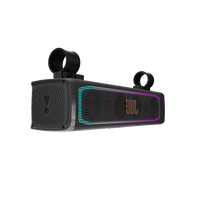
JBL RALLYBAR
21" Bluetooth® Universal Outdoor Vehicle Soundbar with LED lights and 150Wrms amplifier
Introduction Year: 2023View product -
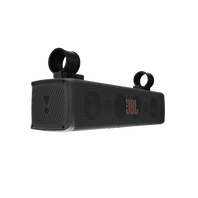
JBL RALLYBAR S
21" Bluetooth® Universal Outdoor Vehicle Soundbar with 150Wrms amplifier
Introduction Year: 2023View product -

JBL RALLYBAR XL
35" Bluetooth® Universal Outdoor Vehicle Soundbar with LED lights and 300Wrms amplifier
Introduction Year: 2023View product -

JBL Cinema SB190
2.1 Channel soundbar with Virtual Dolby Atmos and wireless subwoofer
Introduction Year: 2022View product -

-

-


Can’t find what you’re looking for?

Call Us
Talk to a product expert
Call us now at:
+855 15 512 512
NANO SOUND
+855 17 717 885
Email: Rottnaleang@gmail.com
Kfour Group Ltd.
078 88 72 82/ 069 82 87 82
Email: bunarong.kit@kfourgroup.com.kh