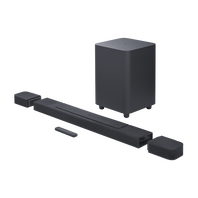
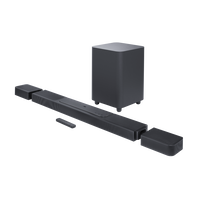
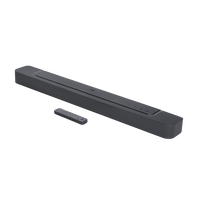
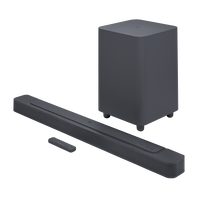
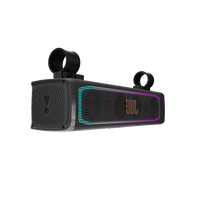
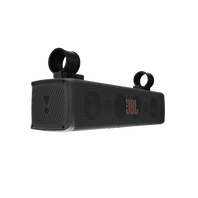
SoundBars

  • Learn how to troubleshoot when you can’t connect your Google Assistant device to your home Wi-Fi network.

    The Checklist

    Let us walk-through a list of things needed to ensure every requirement is met.

    1. Check your mobile device if that is able to connect to same Wireless network.
    2. Make sure you are within range of your Wireless router.
    3. Check the Wireless signal on your mobile device, does it have a weak signal then move closer to the router.
    4. Try both Wireless network bands 2.4GHz and 5GHz in case one of them are failing.
      1. You will have longer range with 2.4GHz, but less performance and most of the times a crowded network (many devices are using 2.4GHz band).
      2. You will have less interference with 5GHz and higher performance, however, the range of the 5GHz network has shorter range.
    5. Try using a different mobile device, if you have one.
    6. Reboot your Wireless network router and your mobile device.
    Watch the video below for help with setting up your Google Assistant device.

    Wireless Network Extender

    Some houses or apartments can be too big for one Wireless network router to cover it all.
    Let's talk about the issues that might appear with an Extender network.

    1. Network Extenders that will help cover poor signal in your home, often results in poor connection and low speed performance.
    2. Often the Network Extender is a low budget device or not suited for having too many devices attached to it.
    3. Placement of the speaker is crucial as you can put it in a place where it could connect to either main Wireless router or the Extender, that will confuse Wireless network devices.
    4. To solve this issue, try move the speaker closer to main router or have fewer devices attached to your Wireless Extender.
    5. In addition, always use 5GHz connection between your Network extender and main router (best solution and performance).

    One Wireless Network Name (SSID)

    1. You may have set the Wireless Network SSID (Wi-Fi network name) to one big Wireless network (With a main router + Extender(s).
    2. If the JBL LINK device is within range of both Wireless networks (Main router & Extender) then it can get confused with which one to connect to.
    3. To solve this issue, using two different name for your extended network will help with the performance of the JBL LINK Speaker and Google Assistant request.


    BAR 9.1: Software Update Release Notes
    BAR 9.1
    Software Update Release Notes
    ------------------------------------------------------------------------
    Version:  V22.01.31.80
    Release Date:  May 19, 2022
    Release Media:  OTA (over the air) Automatic Upgrade and/or USB
    Filename:  JBL Bar9.1 TWS ver 22.01.31.80.zip
    1. Fixed a grouping issue with other Chromecast built-in speakers (read below):
      1. 3rd party Chromecast built-in speakers using a Google SDK less than 1.52GM2 can not be grouped with 1st party Google speakers any longer. This update brings the Bar 9.1 up to 1.52GM2, which means once again, it can be grouped with 1st party Google speakers
    2. Software update resolves the issues with the "Google Home" app if you are using an Android phone (read below):
      1. Speakers with an SDK less than 1.52GM2 set up with a Google Pixel phone need to use a new, additional app called the "Device Utility app" to complete the Wi-Fi setup. After this update, customers may use the Google Home app as normal for Wi-Fi setup
    3. General software and performance improvements:
      1. Sometimes there was a 0.5sec audio drop during ARC streaming with PCM format, now improved!
      2. Import MTK patch to solve continuous distortion after connecting Apple TV to a Sony TV while playing PCM stream in eARC source.

    Note:  This software upgrade is not applicable for JBL Bar 9.1 China version.
    注意:此软件升级不适用于JBL Bar 9.1中国版。

    ------------------------------------------------------------------------
    Version:  V21.23.11.80
    Release Date:  June 8th, 2021
    Release Media:  OTA (over the air) Automatic Upgrade and/or USB
    Filename:  JBL Bar9.1 TWS ver 21.23.11.80.zip

    1.    Improve calibration success rate in some cases.
    2.    Improve compatibility of some “ATMOS” Netflix streaming content. 
    3.    Improve LED Display messages.

    Note:  This software upgrade is not applicable for JBL Bar 9.1 China version.
    注意:此软件升级不适用于JBL Bar 9.1中国版。

    ------------------------------------------------------------------------
    Version:  V21.13.11.80
    Release Date:  April 8, 2021
    Release Media:  OTA (over the air) Automatic Upgrade and/or USB
    Filename:  JBL Bar9.1 TWS ver 21.13.11.80.zip
    • Improves Soundbar Optical, HDMI, and ARC Compatibility with TV.
    • Improves Bluetooth connectivity for mobile devices.
    • Improved LED Display Messages.
    • Bug fix to remove detachable speakers battery level checking due to imprecise readings.
    NOTE:  This software update is not applicable to the JBL BAR 9.1 China version.

    注意:此软件升级不适用于JBL Bar 9.1中国版。

     
    How to find the MAC address

    NOTE: Apple IOS users are not able to find their MAC address in Google Home app due to privacy policies in the USA and European market.

    We advise setting up your device on a less secure network. Log into the router and retrieve the MAC address for your device then add it to your preferred network.

    Instructions below are for Android only

    1. Open your Google Home app Google Home app
    2. Enable Bluetooth User-added image on your device.
    3. Enable Location service User-added image on your Android device.
      1. Remember to "Allow" Google Home to view your location while using the app (You are asked during setup of the Google Home app).
      2. In case you denied access go to Settings User-added image Apps User-added image Google Home User-added image Permissions User-added image Allow to view Location.
    4. When you at selecting the Wi-Fi network from the list of available networks, before tapping on your network you need to get the MAC address.
      1. Tap  the User-added image located top right corner.
      2. In the pop-up menu press "Show MAC address" User-added image Write down the MAC Address.
    part 3User-added imagepart 5

    You can now add the MAC address to your local Wireless router or system if your configuration requires this before installing the device on your network.

    Finding the MAC address after speaker is installed

    1. Open your Google Home app Google Home app.
    2. Tap on  to view your home.
    3. Find your room User-added image.
    4. In the top right corner tap Settings icon User-added image.
    5. ​Scroll down to the bottom of the screen. You will see some system information and the MAC address as well.
    BAR 9.1 - battery status
    The Mute+ATMOS combination button press to determine the Battery Status was originally designed for production line testing, not for consumer usage.  We determined that this testing method was inaccurate and began testing using specialized external equipment.  As of Software Version V21.13.11.80, the ability to check Battery Status inaccurately has been removed.

    When charging the satellite speakers you can be confident that the Battery Status is 100% when the LED indicator goes  out.  As well, when the LED begins blinking red, you are at 20% and should recharge or plug in your speakers.
    More FAQs
  • Learn how to troubleshoot when you can’t connect your Google Assistant device to your home Wi-Fi network.

    The Checklist

    Let us walk-through a list of things needed to ensure every requirement is met.

    1. Check your mobile device if that is able to connect to same Wireless network.
    2. Make sure you are within range of your Wireless router.
    3. Check the Wireless signal on your mobile device, does it have a weak signal then move closer to the router.
    4. Try both Wireless network bands 2.4GHz and 5GHz in case one of them are failing.
      1. You will have longer range with 2.4GHz, but less performance and most of the times a crowded network (many devices are using 2.4GHz band).
      2. You will have less interference with 5GHz and higher performance, however, the range of the 5GHz network has shorter range.
    5. Try using a different mobile device, if you have one.
    6. Reboot your Wireless network router and your mobile device.
    Watch the video below for help with setting up your Google Assistant device.

    Wireless Network Extender

    Some houses or apartments can be too big for one Wireless network router to cover it all.
    Let's talk about the issues that might appear with an Extender network.

    1. Network Extenders that will help cover poor signal in your home, often results in poor connection and low speed performance.
    2. Often the Network Extender is a low budget device or not suited for having too many devices attached to it.
    3. Placement of the speaker is crucial as you can put it in a place where it could connect to either main Wireless router or the Extender, that will confuse Wireless network devices.
    4. To solve this issue, try move the speaker closer to main router or have fewer devices attached to your Wireless Extender.
    5. In addition, always use 5GHz connection between your Network extender and main router (best solution and performance).

    One Wireless Network Name (SSID)

    1. You may have set the Wireless Network SSID (Wi-Fi network name) to one big Wireless network (With a main router + Extender(s).
    2. If the JBL LINK device is within range of both Wireless networks (Main router & Extender) then it can get confused with which one to connect to.
    3. To solve this issue, using two different name for your extended network will help with the performance of the JBL LINK Speaker and Google Assistant request.


    How to find the MAC address

    NOTE: Apple IOS users are not able to find their MAC address in Google Home app due to privacy policies in the USA and European market.

    We advise setting up your device on a less secure network. Log into the router and retrieve the MAC address for your device then add it to your preferred network.

    Instructions below are for Android only

    1. Open your Google Home app Google Home app
    2. Enable Bluetooth User-added image on your device.
    3. Enable Location service User-added image on your Android device.
      1. Remember to "Allow" Google Home to view your location while using the app (You are asked during setup of the Google Home app).
      2. In case you denied access go to Settings User-added image Apps User-added image Google Home User-added image Permissions User-added image Allow to view Location.
    4. When you at selecting the Wi-Fi network from the list of available networks, before tapping on your network you need to get the MAC address.
      1. Tap  the User-added image located top right corner.
      2. In the pop-up menu press "Show MAC address" User-added image Write down the MAC Address.
    part 3User-added imagepart 5

    You can now add the MAC address to your local Wireless router or system if your configuration requires this before installing the device on your network.

    Finding the MAC address after speaker is installed

    1. Open your Google Home app Google Home app.
    2. Tap on  to view your home.
    3. Find your room User-added image.
    4. In the top right corner tap Settings icon User-added image.
    5. ​Scroll down to the bottom of the screen. You will see some system information and the MAC address as well.
  • What is the distance between wall-mounts on JBL BAR soundbars
    The distance between wall-mounts centers are: JBL BAR Studio: 45 cm. JBL BAR 2.1: 70 cm. JBL BAR 3.1: 70 cm. JBL BAR 5.1: 61 cm JBL BAR 5.1 Surround: 71.85 cm JBL BAR 9.1: 55,5 cm
    How can I reset the JBL Bar 2.1, JBL Bar 3.1 and JBL Bar 5.1?
    Press and hold the Source, Vol+ and Vol- buttons at the same time until you see the text "reset" on the soundbar's display.
    How do I pair the subwoofer to my JBL BAR soundbar if pairing does not happen automatically?
    Normal pairing is automatic, and happens when you first switch both devices on. If pairing does not take place automatically, or you have to force new pairing, here is what to do: Turn on the soundbar and the subwoofer. If the connection is lost, the LED indicator on the subwoofer blinks slowly. Second, press the CONNECT button on the subwoofer to enter pairing mode. The LED indicator on the subwoofer blinks quickly. Third, press and hold the DIM DISPLAY button on the remote control for 5 seconds, followed by short press on BASS+, and BASS- button in sequence. Panel display will show “PAIRING”. If pairing succeeds, the LED indicator on the subwoofer lights up, and the soundbar display will show "DONE”. If pairing fails, the indicator on the subwoofer blinks slowly. Lastly, if the pairing fails, repeat the steps above. If you have continued trouble performing the pairing, please try to switch off all wireless devices in the home, then try again. This means routers, TV sets with wireless functions, telephones, computers etc. Since overcrowding on the 2.4 GHz frequency now often causes problems, eliminating all this activity makes space for the Bar to establish its connection, and you should be able to pair without problems. Afterwards, you can switch your devices on again. Often, all will now work fine, and if not, you will know which devices are doing the interference.
  • Learn how to troubleshoot when you can’t connect your Google Assistant device to your home Wi-Fi network.

    The Checklist

    Let us walk-through a list of things needed to ensure every requirement is met.

    1. Check your mobile device if that is able to connect to same Wireless network.
    2. Make sure you are within range of your Wireless router.
    3. Check the Wireless signal on your mobile device, does it have a weak signal then move closer to the router.
    4. Try both Wireless network bands 2.4GHz and 5GHz in case one of them are failing.
      1. You will have longer range with 2.4GHz, but less performance and most of the times a crowded network (many devices are using 2.4GHz band).
      2. You will have less interference with 5GHz and higher performance, however, the range of the 5GHz network has shorter range.
    5. Try using a different mobile device, if you have one.
    6. Reboot your Wireless network router and your mobile device.
    Watch the video below for help with setting up your Google Assistant device.

    Wireless Network Extender

    Some houses or apartments can be too big for one Wireless network router to cover it all.
    Let's talk about the issues that might appear with an Extender network.

    1. Network Extenders that will help cover poor signal in your home, often results in poor connection and low speed performance.
    2. Often the Network Extender is a low budget device or not suited for having too many devices attached to it.
    3. Placement of the speaker is crucial as you can put it in a place where it could connect to either main Wireless router or the Extender, that will confuse Wireless network devices.
    4. To solve this issue, try move the speaker closer to main router or have fewer devices attached to your Wireless Extender.
    5. In addition, always use 5GHz connection between your Network extender and main router (best solution and performance).

    One Wireless Network Name (SSID)

    1. You may have set the Wireless Network SSID (Wi-Fi network name) to one big Wireless network (With a main router + Extender(s).
    2. If the JBL LINK device is within range of both Wireless networks (Main router & Extender) then it can get confused with which one to connect to.
    3. To solve this issue, using two different name for your extended network will help with the performance of the JBL LINK Speaker and Google Assistant request.


    How to find the MAC address

    NOTE: Apple IOS users are not able to find their MAC address in Google Home app due to privacy policies in the USA and European market.

    We advise setting up your device on a less secure network. Log into the router and retrieve the MAC address for your device then add it to your preferred network.

    Instructions below are for Android only

    1. Open your Google Home app Google Home app
    2. Enable Bluetooth User-added image on your device.
    3. Enable Location service User-added image on your Android device.
      1. Remember to "Allow" Google Home to view your location while using the app (You are asked during setup of the Google Home app).
      2. In case you denied access go to Settings User-added image Apps User-added image Google Home User-added image Permissions User-added image Allow to view Location.
    4. When you at selecting the Wi-Fi network from the list of available networks, before tapping on your network you need to get the MAC address.
      1. Tap  the User-added image located top right corner.
      2. In the pop-up menu press "Show MAC address" User-added image Write down the MAC Address.
    part 3User-added imagepart 5

    You can now add the MAC address to your local Wireless router or system if your configuration requires this before installing the device on your network.

    Finding the MAC address after speaker is installed

    1. Open your Google Home app Google Home app.
    2. Tap on  to view your home.
    3. Find your room User-added image.
    4. In the top right corner tap Settings icon User-added image.
    5. ​Scroll down to the bottom of the screen. You will see some system information and the MAC address as well.
  • How does Harman Volume work on JBL Cinema Base?
    Harman Volume on the Cinema Base has no levels, it's either on or off. It will remember the last setting when it's powered on. When you enable Harman Volume, you will hear audio feedback ( 4 tones going up when you turn it on, and 4 tones going down when you turn it off ) There is no visual indication that shows if it's on or off
  • Learn how to troubleshoot when you can’t connect your Google Assistant device to your home Wi-Fi network.

    The Checklist

    Let us walk-through a list of things needed to ensure every requirement is met.

    1. Check your mobile device if that is able to connect to same Wireless network.
    2. Make sure you are within range of your Wireless router.
    3. Check the Wireless signal on your mobile device, does it have a weak signal then move closer to the router.
    4. Try both Wireless network bands 2.4GHz and 5GHz in case one of them are failing.
      1. You will have longer range with 2.4GHz, but less performance and most of the times a crowded network (many devices are using 2.4GHz band).
      2. You will have less interference with 5GHz and higher performance, however, the range of the 5GHz network has shorter range.
    5. Try using a different mobile device, if you have one.
    6. Reboot your Wireless network router and your mobile device.
    Watch the video below for help with setting up your Google Assistant device.

    Wireless Network Extender

    Some houses or apartments can be too big for one Wireless network router to cover it all.
    Let's talk about the issues that might appear with an Extender network.

    1. Network Extenders that will help cover poor signal in your home, often results in poor connection and low speed performance.
    2. Often the Network Extender is a low budget device or not suited for having too many devices attached to it.
    3. Placement of the speaker is crucial as you can put it in a place where it could connect to either main Wireless router or the Extender, that will confuse Wireless network devices.
    4. To solve this issue, try move the speaker closer to main router or have fewer devices attached to your Wireless Extender.
    5. In addition, always use 5GHz connection between your Network extender and main router (best solution and performance).

    One Wireless Network Name (SSID)

    1. You may have set the Wireless Network SSID (Wi-Fi network name) to one big Wireless network (With a main router + Extender(s).
    2. If the JBL LINK device is within range of both Wireless networks (Main router & Extender) then it can get confused with which one to connect to.
    3. To solve this issue, using two different name for your extended network will help with the performance of the JBL LINK Speaker and Google Assistant request.


    How to find the MAC address

    NOTE: Apple IOS users are not able to find their MAC address in Google Home app due to privacy policies in the USA and European market.

    We advise setting up your device on a less secure network. Log into the router and retrieve the MAC address for your device then add it to your preferred network.

    Instructions below are for Android only

    1. Open your Google Home app Google Home app
    2. Enable Bluetooth User-added image on your device.
    3. Enable Location service User-added image on your Android device.
      1. Remember to "Allow" Google Home to view your location while using the app (You are asked during setup of the Google Home app).
      2. In case you denied access go to Settings User-added image Apps User-added image Google Home User-added image Permissions User-added image Allow to view Location.
    4. When you at selecting the Wi-Fi network from the list of available networks, before tapping on your network you need to get the MAC address.
      1. Tap  the User-added image located top right corner.
      2. In the pop-up menu press "Show MAC address" User-added image Write down the MAC Address.
    part 3User-added imagepart 5

    You can now add the MAC address to your local Wireless router or system if your configuration requires this before installing the device on your network.

    Finding the MAC address after speaker is installed

    1. Open your Google Home app Google Home app.
    2. Tap on  to view your home.
    3. Find your room User-added image.
    4. In the top right corner tap Settings icon User-added image.
    5. ​Scroll down to the bottom of the screen. You will see some system information and the MAC address as well.
  • What is the distance between wall-mounts on JBL BAR soundbars
    The distance between wall-mounts centers are: JBL BAR Studio: 45 cm. JBL BAR 2.1: 70 cm. JBL BAR 3.1: 70 cm. JBL BAR 5.1: 61 cm JBL BAR 5.1 Surround: 71.85 cm JBL BAR 9.1: 55,5 cm
    How can I reset the JBL Bar 2.1, JBL Bar 3.1 and JBL Bar 5.1?
    Press and hold the Source, Vol+ and Vol- buttons at the same time until you see the text "reset" on the soundbar's display.
    How do I pair the subwoofer to my JBL BAR soundbar if pairing does not happen automatically?
    Normal pairing is automatic, and happens when you first switch both devices on. If pairing does not take place automatically, or you have to force new pairing, here is what to do: Turn on the soundbar and the subwoofer. If the connection is lost, the LED indicator on the subwoofer blinks slowly. Second, press the CONNECT button on the subwoofer to enter pairing mode. The LED indicator on the subwoofer blinks quickly. Third, press and hold the DIM DISPLAY button on the remote control for 5 seconds, followed by short press on BASS+, and BASS- button in sequence. Panel display will show “PAIRING”. If pairing succeeds, the LED indicator on the subwoofer lights up, and the soundbar display will show "DONE”. If pairing fails, the indicator on the subwoofer blinks slowly. Lastly, if the pairing fails, repeat the steps above. If you have continued trouble performing the pairing, please try to switch off all wireless devices in the home, then try again. This means routers, TV sets with wireless functions, telephones, computers etc. Since overcrowding on the 2.4 GHz frequency now often causes problems, eliminating all this activity makes space for the Bar to establish its connection, and you should be able to pair without problems. Afterwards, you can switch your devices on again. Often, all will now work fine, and if not, you will know which devices are doing the interference.
  • What is the distance between wall-mounts on JBL BAR soundbars
    The distance between wall-mounts centers are: JBL BAR Studio: 45 cm. JBL BAR 2.1: 70 cm. JBL BAR 3.1: 70 cm. JBL BAR 5.1: 61 cm JBL BAR 5.1 Surround: 71.85 cm JBL BAR 9.1: 55,5 cm
  • What is the distance between wall-mounts on JBL BAR soundbars
    The distance between wall-mounts centers are: JBL BAR Studio: 45 cm. JBL BAR 2.1: 70 cm. JBL BAR 3.1: 70 cm. JBL BAR 5.1: 61 cm JBL BAR 5.1 Surround: 71.85 cm JBL BAR 9.1: 55,5 cm
    How can I reset the JBL Bar 2.1, JBL Bar 3.1 and JBL Bar 5.1?
    Press and hold the Source, Vol+ and Vol- buttons at the same time until you see the text "reset" on the soundbar's display.
    How do I pair the subwoofer to my JBL BAR soundbar if pairing does not happen automatically?
    Normal pairing is automatic, and happens when you first switch both devices on. If pairing does not take place automatically, or you have to force new pairing, here is what to do: Turn on the soundbar and the subwoofer. If the connection is lost, the LED indicator on the subwoofer blinks slowly. Second, press the CONNECT button on the subwoofer to enter pairing mode. The LED indicator on the subwoofer blinks quickly. Third, press and hold the DIM DISPLAY button on the remote control for 5 seconds, followed by short press on BASS+, and BASS- button in sequence. Panel display will show “PAIRING”. If pairing succeeds, the LED indicator on the subwoofer lights up, and the soundbar display will show "DONE”. If pairing fails, the indicator on the subwoofer blinks slowly. Lastly, if the pairing fails, repeat the steps above. If you have continued trouble performing the pairing, please try to switch off all wireless devices in the home, then try again. This means routers, TV sets with wireless functions, telephones, computers etc. Since overcrowding on the 2.4 GHz frequency now often causes problems, eliminating all this activity makes space for the Bar to establish its connection, and you should be able to pair without problems. Afterwards, you can switch your devices on again. Often, all will now work fine, and if not, you will know which devices are doing the interference.
  • Learn how to troubleshoot when you can’t connect your Google Assistant device to your home Wi-Fi network.

    The Checklist

    Let us walk-through a list of things needed to ensure every requirement is met.

    1. Check your mobile device if that is able to connect to same Wireless network.
    2. Make sure you are within range of your Wireless router.
    3. Check the Wireless signal on your mobile device, does it have a weak signal then move closer to the router.
    4. Try both Wireless network bands 2.4GHz and 5GHz in case one of them are failing.
      1. You will have longer range with 2.4GHz, but less performance and most of the times a crowded network (many devices are using 2.4GHz band).
      2. You will have less interference with 5GHz and higher performance, however, the range of the 5GHz network has shorter range.
    5. Try using a different mobile device, if you have one.
    6. Reboot your Wireless network router and your mobile device.
    Watch the video below for help with setting up your Google Assistant device.

    Wireless Network Extender

    Some houses or apartments can be too big for one Wireless network router to cover it all.
    Let's talk about the issues that might appear with an Extender network.

    1. Network Extenders that will help cover poor signal in your home, often results in poor connection and low speed performance.
    2. Often the Network Extender is a low budget device or not suited for having too many devices attached to it.
    3. Placement of the speaker is crucial as you can put it in a place where it could connect to either main Wireless router or the Extender, that will confuse Wireless network devices.
    4. To solve this issue, try move the speaker closer to main router or have fewer devices attached to your Wireless Extender.
    5. In addition, always use 5GHz connection between your Network extender and main router (best solution and performance).

    One Wireless Network Name (SSID)

    1. You may have set the Wireless Network SSID (Wi-Fi network name) to one big Wireless network (With a main router + Extender(s).
    2. If the JBL LINK device is within range of both Wireless networks (Main router & Extender) then it can get confused with which one to connect to.
    3. To solve this issue, using two different name for your extended network will help with the performance of the JBL LINK Speaker and Google Assistant request.


    How to find the MAC address

    NOTE: Apple IOS users are not able to find their MAC address in Google Home app due to privacy policies in the USA and European market.

    We advise setting up your device on a less secure network. Log into the router and retrieve the MAC address for your device then add it to your preferred network.

    Instructions below are for Android only

    1. Open your Google Home app Google Home app
    2. Enable Bluetooth User-added image on your device.
    3. Enable Location service User-added image on your Android device.
      1. Remember to "Allow" Google Home to view your location while using the app (You are asked during setup of the Google Home app).
      2. In case you denied access go to Settings User-added image Apps User-added image Google Home User-added image Permissions User-added image Allow to view Location.
    4. When you at selecting the Wi-Fi network from the list of available networks, before tapping on your network you need to get the MAC address.
      1. Tap  the User-added image located top right corner.
      2. In the pop-up menu press "Show MAC address" User-added image Write down the MAC Address.
    part 3User-added imagepart 5

    You can now add the MAC address to your local Wireless router or system if your configuration requires this before installing the device on your network.

    Finding the MAC address after speaker is installed

    1. Open your Google Home app Google Home app.
    2. Tap on  to view your home.
    3. Find your room User-added image.
    4. In the top right corner tap Settings icon User-added image.
    5. ​Scroll down to the bottom of the screen. You will see some system information and the MAC address as well.

Further Support

Headphone Support Guide

Need help to resolve some of the most common headphone challenges?

Learn more

Watch & Learn

Have you seen our Youtube channel?

Many of our products have videos introducing them.

Learn more

Can’t find what you’re looking for?

Call Us

Call Us

To speak to our customer service specialist

1800-102-0525

Mon - Sun: 10:00 am - 7:00 pm (IST)

E-mail Us

E-mail Us

Email our customer service team
365 days, we will reply within 24 hours

Email us
message

WhatsApp Us

Chat with a support agent via Whatsapp at:
by clicking https://bit.ly/2SfFSPh or send hi to 91 70658 44446 

Mon - Sun: 10:00 am - 7:00 pm (IST)